Once your AWS instance is created we need a way to access those EC2 files. We can use any FTP software out there, but here we will using FileZilla, its more than sufficient to serve my purpose. Before we proceed with Filezilla aws setup, we need to have the .prem file which used to connect aws using ssh. The .prem is generated when you create a new instance, Save the file somewhere safe.
Host details can be found in the AWS EC2 console. It would be mentioned as of Public DNS (IPv4)/ IPv4 Public IP. It’s Better to Create to an Elastic IP and assign to it the Instance, so that there is no chance of losing the host address when the Instance is rebooted.
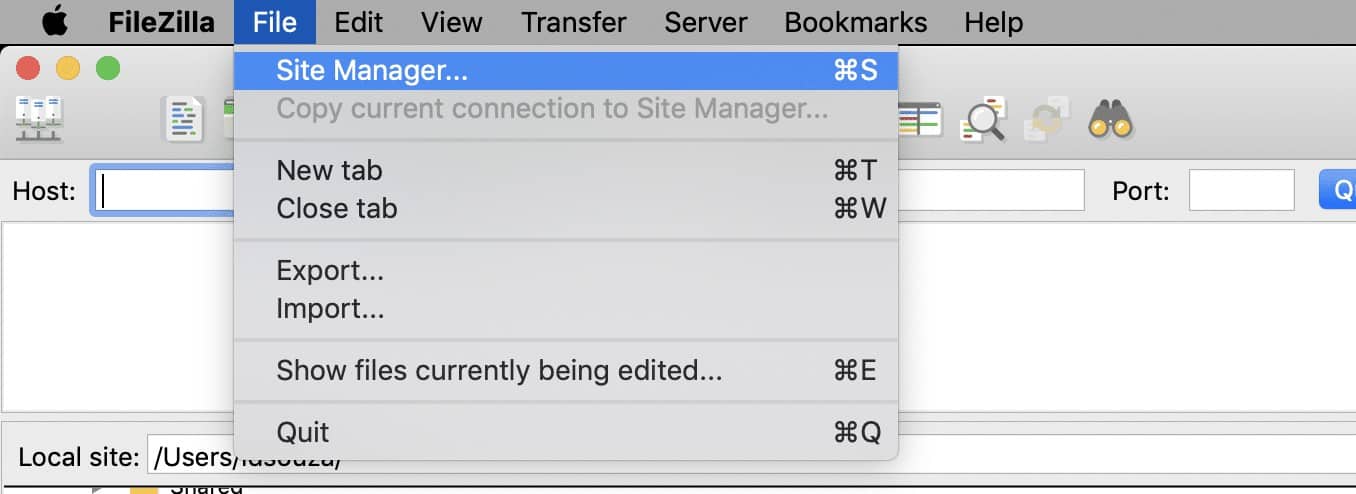
Next download the Filezilla and proceed with installation setup. Open filezilla application and click on menu File -> Site Manager (⌘S), as shown in the below image:

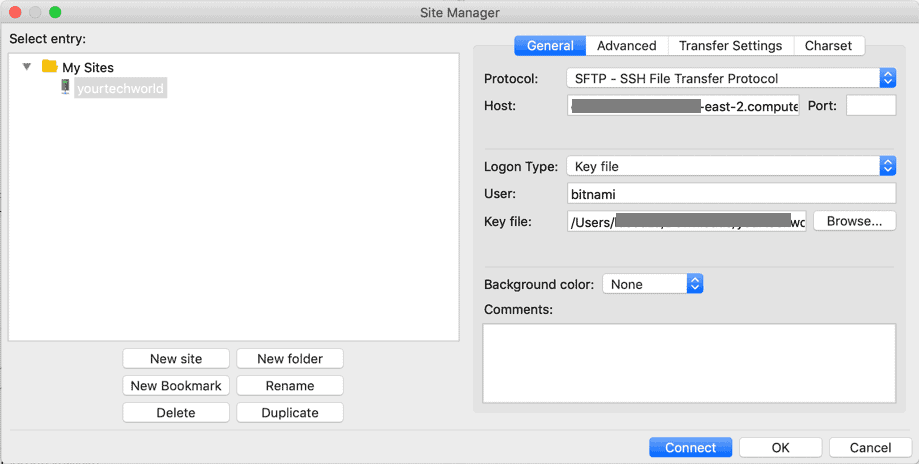
- Select Protocol as STP – SSH File Transfer Protocol.
- Enter your Host address. Eg. ec2-*-**-8***-99.us-east-2.compute.amazonaws.com
- Select Logon type as Key File
- Put your user name in the User field : for me it’s bitnami
- For Key file field, browse your pem file

You can also use Public IP address as Host Address. Once you click on Connect. You will be able to connect your EC2 instance.
On my next post I would be sharing how to enable HTTPS on your website.


